
7 common mistakes when insulating a habitable attic
Published on 31.07.2026 · Isoflect Insulation technical team
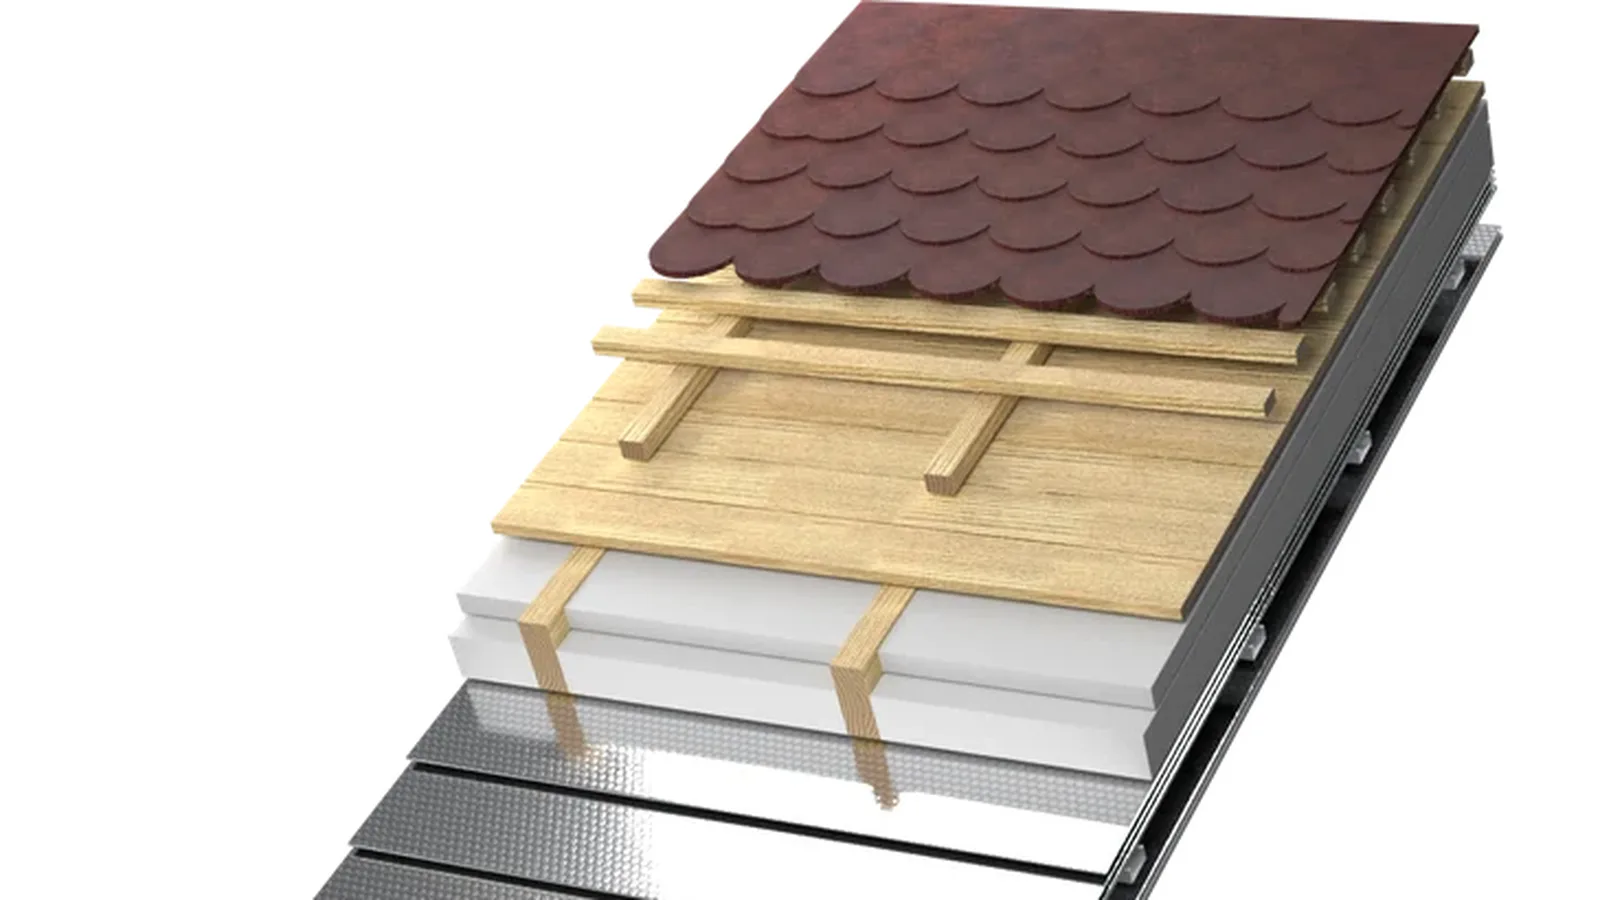
A habitable attic may appear well insulated immediately after finishing, but the real test comes in the first winter, on hot summer days and after several seasons of high humidity. The costliest frequent mistakes in habitable attic insulation relate not only to the material chosen, but to the way in which all the layers work together: the thermal insulation, the membranes, the sealing, the ventilation space and the interior finish.
Effective insulation does not simply mean filling the rafter spaces with a thicker material. It means limiting heat losses, managing indoor vapour, reducing the risk of condensation and keeping the roof structure dry. When a single layer is installed incorrectly, the effect may appear in the form of cold draughts, higher bills, mould or even deterioration of the timber.
Why habitable attic insulation must be regarded as a system
The habitable attic is a sensitive area of the house. It has sloping surfaces, many joints, penetrations for cables and building services, roof windows, ridges and junctions with walls. Every detail can become a path for air, vapour or water.
From the interior to the exterior, a correct system must control warm, humid air, provide sufficient thermal resistance, allow controlled drying of the structure and protect the insulation from incidental leaks beneath the roof covering. The exact order of layers depends on the type of roof, the climate, the roof covering material and the existing construction solution. For this reason, copying a detail seen in another project can be risky.
Frequent mistakes in habitable attic insulation that reduce performance
1. Installation without an assessment of the existing roof
Insulation does not repair a roof that leaks. If the roof covering, the junctions, the chimney or the membrane beneath the roof covering allow water to penetrate, the thermal insulation material may retain moisture and the timber may begin to deteriorate.
Before installation, check the condition of the rafters, traces of water, blackened areas, any persistent smell of damp and the continuity of the protection beneath the roof covering. If the habitable attic is already in use and access is limited, it is worth investigating the cause of any stain before closing the structure again with plasterboard. A timely local repair costs much less than dismantling a new insulation system.
2. Choosing the thickness solely according to the space between the rafters
A common mistake is to rely exclusively on the thickness available between the rafters. If the structure allows only a certain space, this does not automatically mean that the space provides the thermal level necessary for comfort and low energy consumption.
Performance is analysed through the thermal resistance of the entire assembly, not merely the thickness of a single material. What matters is the Lambda value, the actual installed thickness, the interruptions caused by the rafter timber and the continuity of the insulating layer. Timber conducts more heat than thermal insulation materials, so each rafter becomes a partial thermal bridge.
A practical solution is to supplement the insulation between the rafters with a continuous layer on the inner side. This layer reduces thermal bridges and can improve comfort without any intervention on the roof covering. However, the additional thickness must be calculated together with the position of the vapour control membrane and the usable space remaining in the habitable attic.
3. The vapour control membrane installed on the wrong side
Water vapour originates from normal activities: cooking, showers, breathing, drying laundry. In the cold season, warm indoor air tends to migrate towards colder areas. If it reaches the body of the insulation or the cold components of the roof in an uncontrolled manner, interstitial condensation may occur.
The vapour control membrane is usually installed towards the interior of the heated space, on the warm side of the insulation. However, the mere presence of a membrane is not sufficient. The joints must be correctly overlapped and bonded, the edges must be sealed to the walls and structural components, and the perforations for cables, spotlights or pipes must be treated with compatible accessories.
Confusion between a vapour barrier, a variable-diffusion membrane and an anti-condensation membrane can produce effects contrary to those intended. The choice depends on the roof structure and the capacity of the assembly to dry out. In renovations, where the existing layers are not always known, this decision is worth verifying technically before purchase.
4. Disregarding airtightness
A habitable attic may contain a great deal of insulating material and still be cold if air circulates through joints. Air currents through sockets, corners, the perimeter of roof windows, service penetrations or membrane joints transport heat and moisture much faster than normal vapour diffusion.
Airtightness is one of the best investments in assured and predictable performance. This does not mean that the dwelling no longer breathes. Correct room ventilation is achieved in a controlled manner, through windows, ventilation systems or heat recovery, not through hidden gaps in the roof.
For good results, plan the cable and pipe routes before the walls are closed. A service void between the membrane and the interior lining reduces perforations and allows subsequent interventions without compromising the seal.
5. Lack of a ventilation space and incorrect use of the membrane beneath the roof covering
Beneath the roof covering, water may arrive from wind-driven rain, blown snow or condensation formed on the underside of the roof covering material. A correctly installed diffusion membrane contributes to releasing vapour outwards and to protecting the insulation against incidental moisture.
The problem arises when the ventilation path required by the roof is blocked, or when the insulation is pushed directly against the membrane beneath the roof covering without observing the detail required by the construction system. Some roofs permit contact with certain highly vapour-permeable membranes; others require a clearly defined ventilated gap. There is no universal rule that applies to every membrane and every roof covering.
Always verify the compatibility between the diffusion membrane, the type of roof boarding, the ventilation space at the eaves and the air outlet at the ridge. Incomplete ventilation can retain moisture in the structure even when the insulation has been correctly selected.
6. Compressing the wool and filling cavities aggressively
Fibrous materials function by means of the air immobilised within their structure. When wool is excessively compressed in order to fit into a cavity that is too small, the effective thickness decreases and the actual thermal performance changes. Equally problematic is installation that leaves gaps between boards or batts, particularly around the rafters and at the junctions with the walls.
The insulation must be cut precisely so that it sits firmly without being packed in. In difficult areas, such as edges, roof windows and structural penetrations, the details must be executed with patience. A few uninsulated centimetres in a repeated zone can reduce perceived comfort far more than their apparently small area would suggest.
7. Neglecting roof windows and service penetrations
Roof windows are valuable sources of natural light, but they are also areas at high risk of air leakage and thermal bridging. The insulation must continue up to the window frame, and the interior airtight layer must be correctly connected to the frame. The finish also matters: the upper part of the reveal is, as a rule, executed horizontally and the lower part vertically, in order to support the circulation of warm air along the glazing.
The same attention is required at chimneys, HVAC ducts, pipes and recessed spotlights. Observe the safety distances from hot elements and do not interrupt the airtight layers without a dedicated solution. Hasty installation can conceal vulnerable points that become visible only after the first cold season.
A safer sequence of work for habitable attics
A predictable project begins with measurements and with the identification of the existing layers. The objective is then established: a permanently habitable attic, an occasionally used room or an unheated attic. The distinction is essential, since the zone that must be included within the thermal envelope is not the same in every case.
Once the roof and ventilation have been checked, the thermal insulation is selected according to thickness, Lambda, behaviour in the presence of moisture, acoustic insulation requirements and the available space. This is followed by gap-free installation, fitting the appropriate membrane on the correct side, careful sealing of all overlaps and the creation of a service cavity before the finish.
For owners who want a coherent solution, rather than rolls or boards purchased separately, a correctly configured attic package reduces the risk of incompatibility between materials. Isoflect can assist in matching the thermal insulation, membranes and sealing accessories to the specific details of the project.
When it is worth requesting a technical check
Request a recommendation before installation if the roof has roof boarding, if you do not know the type of the existing membrane, if the attic has experienced condensation or mould, if you are replacing the roof covering or if you are installing new roof windows. It is also useful when converting a cold attic into a habitable space, since the correct strategy changes once the thermal envelope is relocated.
Clear photographs of the structure, the dimensions between rafters, the available thickness and information about the roof enable a more accurate recommendation than a choice based solely on the price per square metre.
Absolute comfort in a habitable attic does not begin with the finish, but with a correct detail concealed behind it. Select each layer for its actual function, seal carefully and treat moisture as a design parameter, not as a problem to be resolved after it has appeared.
Part of the complete guide: Insulating the habitable attic — cases, layers and thicknesses.
Not sure which Isoflect product suits you? See the complete map — which Isoflect product is installed in each area of the house or open the package configurator to find out exactly what you need and in what quantity.